5 Tips for Perfectly Laying Geotextiles
At EasyMerchant, we source our geotextile membranes in bulk, allowing us to offer you significant savings. But regardless of how cost-effective your geotextiles are, ensuring proper installation is key to avoiding costly mistakes. Nobody wants to buy extra rolls because of errors or dig it all up again to try again.
With that in mind, we've compiled five essential tips to help you get it right the first time around.
Â

Tip 1: Plan Your Overlap Before Ordering
It's quite common for people to underestimate the amount of geotextile they'll need for a project. This often happens because overlap isn't factored in when measuring up.
The amount of overlap depends on the load capacity you aim to achieve, but it's not unusual to lose 5-10% of your total geotextile surface area to ensure precision. While this may not pose a problem for smaller projects like driveways or patios, larger areas could leave you short if you haven't accounted for it. Typically, you'd want to overlap each section or joint of geotextile by 300 to 900mm, with the average being around 500mm. Joints can be secured using waterproof tape, fixing pegs, glue, or sometimes by welding with a heat machine.
Tip 2: Account for a Weaker Subgrade
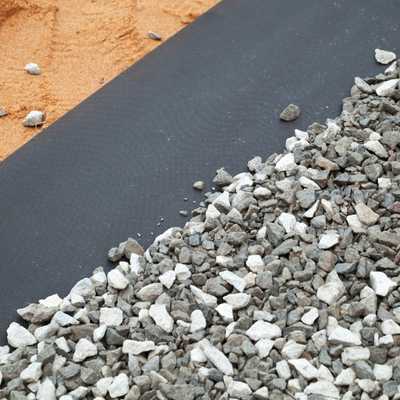
Most geotextile guides recommend fill depths between 8†to 12†(20cm to 30cm), but you might need more if you're working on a weaker subgrade. If the subgrade is particularly weak or consists of loose material, you may want to go for 18†(45cm) or even more.
This is a critical part of project planning, so it's important to understand the conditions you're working with before you measure or price up. The difference between 12†and 18†may seem minor over a small area, but it actually means 50% more fill, so you want to plan and price accordingly.
Having enough fill over the membrane helps prevent it from being punctured once traffic moves over it.
Tip 3: Proper Site Preparation
Preparing your site well is a crucial step in achieving a successful geotextile installation. Sometimes this involves completely removing trees, roots, and other large obstructions. If you encounter pockets of weaker soil, you'll need to replace them with a suitable granular fill or aggregate to ensure stability.
Don't cut corners during this phase. Small imperfections compound as you add layers, turning a minor bump into a major unevenness by the time you finish the job.
Tip 4: Conduct a Dress Rehearsal
Once your site is prepared and smooth, it's time to lay everything out. Resist the urge to start securing your membranes until everything is positioned correctly. If it's a windy day, you can weigh them down to keep them in place, but don't start pinning, taping, or stitching until you're absolutely certain everything is perfect.
If you encounter unexpected issues during your dry run, everything can simply be rolled back. However, once you've started securing the geotextiles, undoing your work becomes a major hassle.
Tip 5: Secure Your Corners
Once you're confident that you're ready to start laying your geotextiles and you've planned out your overlaps, it's time to secure them. Landscape group staples or plastic ground fixing pegs are typically used (glues or tapes can also work). Once your starting point is secure, you can apply the appropriate tension to the sheet. The required tension depends on the manufacturer's instructions for the specific membrane you've ordered, but generally, you want it taut enough to prevent creasing or bunching, which could compromise the layer you've created.
Need Any Help?
At EasyMerchant, we don't just stock Terram geotextiles—we know every product inside and out. Whether you're in the early stages of planning and need help deciding which type of textile is best suited for your project, or you're watching an excavator prepare your site and have a last-minute question, we're here to assist.
Author Bio
Nathan Wilde

Nathan has been in the drainage and plastics industry for over 12 years. With experience working for both builders' merchants and major manufacturers, he's gained a wealth of industry and product knowledge. At EasyMerchant, Nathan is dedicated to making life easier for tradespeople.
Â
Shop Geotextile Membranes

Terram T1000 Non Woven Geotextile Membrane – Custom Size
New type wooden sliding door lock, won't need keys. It won't fray the doorframe, made of 304 stainless steel, available in a variety of finishes.
Yunspire has rich exprience in manufacturing Faucets & Bathroom Accessories of 20 years in Guangdong, China.
Our manufacturing process advanced technology with superior materials, rigorous testing, and comprehensive quality control, all to ensure your complete and total satisfaction.
Door Lock for Sliding Wood Door, Sliding Door Lock Wood, Wooden Sliding Door Lock
WPWF (JIANGMEN) Sanitary Ware Company Co.,Ltd. , https://www.yunspirefaucet.com